Jumat, 01 Juli 2016

Samsung Galaxy Ace 3 user guide manual

Samsung Galaxy Ace 3 user guide manual â€" Samsung Galaxy Ace 3 was released on July 2013 with 4.0 inches screen display and 1 GHz dual core processor. Samsung Galaxy Ace 3 is the third editions from Samsung Ace series with some improvements from its predecessor such screen display size, microSD card slot and RAM. Samsung Galaxy Ace 3 come with several series such as: GT-S7275R, GT-S7270 and GT-S7272 for dual SIM card slot support.


Samsung Galaxy Ace 3 user guide manual


Samsung Galaxy Ace 3 equipped with specifications and key features such as: 121.2 x 62.7 x 10 mm (4.77 x 2.47 x 0.39 inches) in dimension and 120 g (4.22 oz) for weight, 4.0 inches TFT capacitive touchscreen display 480 x 800 pixels screen display 16 million colors with multitouch. microSD up to 64 GB, 8 GB internal storage 5 GB for user storage, 1 GB of RAM, 5 megapixel rear facing camera with autofocus and LED flash, 0.3 megapixel or VGA for front facing camera, run Android 4.2.2 Jelly Bean operating system, powered by 1.2 GHz dual core processor Broadcom BCM21664, Li_ion 1800 mAH battery with up to 370 hours of stand-by time and 8 hours of talk time.

Samsung Galaxy Ace 3 user guide manual series GT-S7275R available to download in pdf file format with 14.73 MB size and contains of 117 pages. Samsung Galaxy Ace 3 GT-S7270 user guide manual with 14.11 MB and 116 pages. Latest for GT-S7272 series available with 13.98 MB and 118 pages.

Table of contents for Samsung Galaxy Ace 3 user guide manual:
  • Getting started
  • Basics
  • Communication
  • Web & network
  • Media
  • Application & media stores
  • Utilities
  • Travel & local
  • Settings
  • Troubleshooting
Download Samsung Galaxy Ace 3 GT-S7275R user guide manual here

Download Samsung Galaxy Ace 3 GT-S7270 user guide manual here

Download Samsung Galaxy Ace 3 GT-S7272 user guide manual here

Acer Iconia Tab B1 A71 User Manual Guide

Acer Iconia Tab B1-A71 User Manual Guide free pdf download instruction operating Setting Troubleshooting, Acer Iconia Tab tablet B1-A71 is the most recent results of artificial named Taiwanese manufacturer Acer. The tablet is also claimed as one tablet with having cheap prices, and have a lighter body than from other vendors tablet artificial results.

Equipped with a 7-inch screen size makes this tablet is very easy to use, even with only one hand grip. And also very easy to carry wherever is traveling, dikarena weighs only reach 320 grams.

That way you will surely make more comfortable in carrying out various activities, which are performed in the latest release of the Acer tablet Iconia Tab B1-A71. In addition to the tablet is very light and the screen is stretched is quite simple, but it also has a system of highly capacitive touch screen.
Google Images
For the latest product of the proceeds made ​​by Acer, carries an operating system uses Android OS v4.1 (Jelly Bean). In order to make users more comfortable in doing the activity that is being done, then the acer was complete with a battery of 2710 mAh.

Acer also equip the machines are made in the kitchen is a reference tablet with a dual core processor which has a speed of 1.2 GHz, which is balanced with a capacity of 512 MB ​​RAM. For further information about the specifications and price of Acer Iconia Tab B1-A71,
Download Acer Iconia Tab B1-A71 Manual User Guide

Guide to Hard Reset Android Sony Xperia Z5 Compact to Remove Pattern Lock Password PIN

Guide to Hard Reset Android Sony Xperia Z5 Compact to Remove Pattern Lock, Password, PIN.

Reset Android Sony Xperia Z5 Compact. Sony Xperia Z5 Compact available worldwide. Todays We will explain to you how to perform hard reset on Sony Xperia Z5 Compact smartphone. Sony Xperia Z5 Compact is the smartphone with 4.6 Inchi IPS LCD capacitive touchscreen, 16M colors, work on Android OS, v5.1.1 (Lollipop), planned upgrade to v6.0 (Marshmallow) and supported with Quad-core 1.5 GHz Cortex-A53 & Quad-core 2.0 GHz Cortex-A57 Processor, chipset Qualcomm MSM8994 Snapdragon 810, GPU Adreno 430. combined with 2 GB of RAM and 23 MP on Primary camera and 5,1 MP on secondary camera. This ony Xperia Z5 Compact is released on 2015, September.

On this guide We will show you how to Hard Reset Android Sony Xperia Z5 Compact to Remove Password, PIN, Pattern Lock. So, if you have any problem such as forgotten password, or forgotten PIN, even forgotten Pattern lock you will enable to enter and use phone menu. You must remove forgotten password or PIN to use your Sony Xperia Z5 Compact normally. this is a simple guide you can follow. To remove any password or PIN stored on your Sony Xperia Z5 Compact, you must perform a hard reset or factory reset on this device. Perform hard reset on any android device will remove or erase or wipe all data stored on your device. So, you must always backup all data before lost it.

On this guide we use PC companion, you can download this PC companion from here. PC Companion will install the latest firmware on your phone and will reset it to the Factory setting.

You must meet a minumum system requirement to run PC Companion ;
  1. You must have at least 2 GB of RAM
  2. 5 GB of free hard disk space.
  3. Intel® Pentium® 4, 3.6 GHz or equivalent AMD processor.
  4. Stabil internet connection or Internet broadband connection.
  5. One available USB 2.0 or USB 3.0 port and USB cable.
  6. Windows Operating System, such as ;
    • Microsoft® Windows XPâ„¢ SP3 (32 bit), 
    • Vista (32/64 bit),Windows 7 (32/64 bit), 
    • Windows 8/8.1 (32/64 bit) or 
    • Windows 10*

Guide to Hard Reset Android Sony Xperia Z5 Compact.

  1. Make sure your computer connect to internet.
  2. If possible, back up all data stored on your Sony Xperia Z5 Compact
  3. Install PC Companion on your computer or laptop.
  4. Then, Run this program, and you will see window with 3 options on screen.
    Hard Reset Android Sony Xperia Z5 Compact
    Hard Reset Android Sony Xperia Z5 Compact
  5. You can see the status is no phone connected, therefore you must connect yuor Sony Xperia Z5 Compact to the PC or computer using USB cable.
  6. Once it connected, PC companion willd detect your phone, and you should see picture shown below on your screen.
    Hard Reset Android Sony Xperia Z5 Compact
    Hard Reset Android Sony Xperia Z5 Compact
  7. If your phone have available update you will see this on your screen.
    Hard Reset Android Sony Xperia Z5 Compact
    Hard Reset Android Sony Xperia Z5 Compact
  8. If you do not want to update your Sony Xperia Z5 Compact just click remind me latter.
  9. Then the program will return to the main menu, now click Support Zone and click start.
    Hard Reset Android Sony Xperia Z5 Compact
    Hard Reset Android Sony Xperia Z5 Compact
  10. Now, Wait for the program to install the appropriate add-on.
  11. On the next window, you can click "Phone / Tablet Software Update" and click start.
    Hard Reset Android Sony Xperia Z5 Compact
    Hard Reset Android Sony Xperia Z5 Compact
  12. Select "repair my phone / tablet".
    Hard Reset Android Sony Xperia Z5 Compact
    Hard Reset Android Sony Xperia Z5 Compact
  13. To continue the next step, you must tick on I unde rstand that I need ... and then click Next.
    Hard Reset Android Sony Xperia Z5 Compact
    Hard Reset Android Sony Xperia Z5 Compact
  14. Now follow the instructions and accept all informations. you will be reminded the data stored in the phone memory will be lost and click Continue.
    Hard Reset Android Sony Xperia Z5 Compact
    Hard Reset Android Sony Xperia Z5 Compact
  15. Please be patient and wait until preparing computer for software update is complete.
    Hard Reset Android Sony Xperia Z5 Compact
    Hard Reset Android Sony Xperia Z5 Compact
  16. Afterwards you can choose your phone / tablet model.
    Hard Reset Android Sony Xperia Z5 Compact
    Hard Reset Android Sony Xperia Z5 Compact
  17. Then click next.
  18. Now, Disconnect Sony Xperia Z5 Compact from computer.
  19. Make sure the battery is fully charged or minimum you have at least 80% of battery capacity.
  20. Then, Turn off the Sony Xperia Z5 Compact and wait for 5 seconds.
  21. Then, connect the USB cable to the computer again.
  22. While press and hold the volume down button on t he Sony Xperia Z5 Compact.
    Hard Reset Android Sony Xperia Z5 Compact
    Hard Reset Android Sony Xperia Z5 Compact
  23. Now, the update of your Sony Xperia Z5 Compact has started.Hard Reset Android Sony Xperia Z5 CompactHard Reset Android Sony Xperia Z5 Compact
  24. Just wait until update is complete.
  25. Once update finish, you can disconnect the phone from computer.
  26. Now, Turn On the Sony Xperia Z5 Compact. Note, that th e first start of the phone after update may take a while.
  27. Finish. 

Archos 70 Titanium tablet user manual guide

Archos 70 Titanium tablet user manual guide â€" Archos 70 Titaniumtablet was announced on January 2013 with other Archos Titanium models, Archos 80, Archos 97 and Archos 101. Archos 70 Titanium performed with 7 inches screen display, equipped with Archos media center apps and wireless media sharing has added.


Archos 70 Titanium tablet user manual guide


Archos 70 Titanium tablet equipped with specifications and key features such as: 198 x 115 x 8.6 mm in dimension with 280 g in weight, 7 inches IPS capaitive touchscreen display 1024 x 600 pixels screen display with multitouch, microSD up to 64 GB, 8 GB internal storage, 1 GB of RAM, run Android 4.1 Jelly Bean operating system, powered by 1.6 GHz dual core processor Mali 400 MP4 and Lithium Polymer battery support.

Archos 70 Titanium tablet user manual guide available to download in pdf file format with 2.2 MB in size and contains of 69 pages.

Table of contents for Archos 70 Titanium tablet user manual guide:
  • Updating the Archos software
  • Need help
  • Description of the device
  • Starting up
  • Connecting to the wi-fi
  • The Archos interface
  • Touchscreen functioning
  • Application store
For owners of Archos 70 Titanium tablet, here we give you direct link download of Archos 70 Titanium tablet user manual guide from official Archos website below:

Download Archos 70 Titanium tablet user manual guide here

Nokia Lumia 822 User Manual Guide Specs And Features

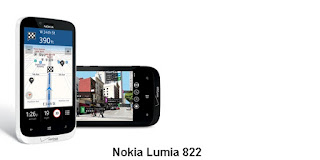
Nokia Lumia 822 User Manual Guide, Specs And Features â€" Nokia Lumia 822 for Verizon Wireless comes with windows phone 8 operating system and has similar performance with Nokia Lumia 820 for AT&T. Nokia Lumia 822 user manual guide contain of 90 pages with 16 chapters.


Nokia Lumia 822 User Manual Guide


Nokia Lumia 822 specifications and features:

  • Powered by Dual-Core processor 1.5GHz CPUs. 
  • Run on Microsofts Windows Phone OS 8. 
  • powerful display AMOLED touchscreen 4.3-inch screen size.
  • 8 megapixel rear facing camera with autofocus and Carl Zeiss Tessar lens, F2.2 and dual LED flash.
  • VGA front facing camera.
  • Navigational features such as city lenses and directory and transit application, Smart Shoot, Cinemagraph, Panorama and creative studios.
  • 8 GB of storage and external memory up to 32GB MicroSD card.


Table of contents for Nokia Lumia 822 user manual guide:

  • Safety
  • Basics
  • Make calls
  • Bluetooth and NFC connectivity
  • People hub
  • Messaging
  • Email
  • Camera
  • Internet
  • Maps and Navigations
  • Entertainment
  • Clock, Calendar, and Calculator
  • Office
  • Safety and Warranty


For Verizon Nokia Lumia 822 owners here we give you direct links for Nokia Lumia 822 user manual guide from official Verizon Wireless website below:

Download Nokia Lumia 822 user manual guide here. 

How to Download Sony Xperia C4 Firmware Using XperiFirm Guide

How to Download Sony Xperia C4 Firmware Using XperiFirm [Guide]

Download Sony Xperia C4 Firmware. This device Also known as Sony Xperia C4 E5303, E5306, E5353, On this guide We will show you how to download Sony Xperia C4 Firmware Using XperiFirm. You can use this firmware to upgrade or downgrade the android system. Even you can fix Sony Xperia C4 android from bootloop or bricked. XperiFirm is a suitable tool let you to download the current firmware for all Sony Xperia or Sony-Ericsson smartphones and tablets running Android operating system directly from your computer or laptop with internet connection. So you dont have to bother to find the Sony Xperia firmware on internet. Xperifirm is a free tool provided by  IgorEisberg on XDA forum.
< br />Sony Xperia C4 released on 2015, May, This device comes with 5,5 Inches IPS capacitive touchscreen, 16M colors LCD, Run on Android OS, v5.0 (Lollipop), planned upgrade to v6.0 (Marshmallow), and supported with Mediatek MT6752 chipset, Octa-core 1.7 GHz Cortex-A53 CPU, GPU Mali-T760MP2, combined with 2 GB of RAM as their  engine. And you can enjoy exciting 13 MP on main camera, and 5 MP on secondary camera to capture your best moments on your life. 

Basic Requirement to Run XperiFirm.

You need this file to run Xperia Firmware Downloader Tool based on your computer o perating systems.
  1. Windows XP Service Pack 3. 
    • You must download and install .Net Framework 4.0 click here to get this file
  2. Windows Vista / 7 
    • You must download and install .Net Framework 4.6 RC click here to get this file
  3. Windows 8/8.1/10
    • Pre installed
  4. Linux
    • Enter the following lines once per computer:
      • $ sudo apt-get install mono-complete
      • $ sudo mozroots --import --machine --sync
      • $ sudo certmgr -ssl -m https://software.sonymobile.com
    • When asked you must enter Y, you should be asked to do so twice)
    • Enter the following line to launch XperiFirm:
      • < li>$ mono XperiFirm.exe
  5. Apple OS X
    • Install Mono for OS X:
      • http://www.mono-project.com/download/
    • Enter the following in Terminal:
      • $ mono XperiFirm.exe

Guide To Download Sony Xperia C4 Firmware.

If you have download all necessary file, now we need a primary tool to download Sony Xperia Firmware, follow this guide how to download Sony Xperia C4 Firmware using Xperia Firmware Downloader Tool.
  1. Download Xperia Firmware Downloader Tool.
  2. When download finished extract and run this tool from your computer. Double click on Icon program shown below. to run this program your computer must be installed .NET framework 3.5 or above.
    Xperia Firmware Downloader Tool icon
    Xperia Firmware Downloader Tool icon
  3. Then the program will open loading windows, to checking for update, requesting log in data,  and downloading resource,
    loading window xperifirm
    loading window xperifirm
  4. When the program fully loaded, now you can select your Sony Xperia model and version in the left navigation windows. You can select Sony Xperia C4 and then select the model (E5303).
    Download Sony Xperia C4 Firmware
    Download Sony Xperia C4 Firmware
  5. See on the right panel window, and you will find all country and market which support your Sony Xperia devices. 
  6. For an example we select market from Belgium, and we will know what is android version on the number shown at latest release. if available.
    Download    Sony Xperia C4 Firmware
    Download Sony Xperia C4 Firmware
  7. To start download this firmware you can navigate your pointer to the right above of this window, under link donate Paypal you can click firmware build number shown.
  8. Then you will see xperia firmware downloader dialogue box appear on your screen. And click Download.
    Download Sony Xperia C4 Firmware
    Download Sony Xperia C4 Firmware
  9. This action will open a new windows browse for folder, you will be asked where will you save your firmware file on your computer. Usually directly go to desktop. But you can change to save to another folder, Once finish decide the folder you can click OK.
    Download Sony Xperia C4  Firmware
    Download Sony Xperia C4 Firmware
  10. And download process will start now, It will take a minute or hour depending your firmware file size.
    Download Sony Xperia C4 Firmware
    Download Sony Xperia C4 Firmware
  11. Once your download complete, you will  see the following pop message “Unpacked Successfully!” Cl ick OK.
    < img alt="Unpacked Successfully xperia firmware download tool" border="0" src="https://blogger.googleusercontent.com/img/b/R29vZ2xl/AVvXsEjLfkQIrQSzP9ozMXdK3hXmo1ecQrtngYqTBB5QL735SiRrgH8kQjv6YKAbH6XeQIWr_pcB87OWbRB-sZxYNUpADVKT2-01HWVyzDgFSr_pIztU5ifNRhicn5jQDLgmatqRHP9Ph6hVEfr7/s1600/xx.jpg" title="Unpacked Successfully xperia firmware download tool" />
    Unpacked Successfully xperia firmware download tool
  12. The same “Unpacked successfully!” message will  appear on the download dialog. Now you can Click “Close”.
    Unpacked Successfully xperia firmware download tool
    Unpacked Successfully xperia firmware download tool
  13. Now check your download location and you will  find a new folder that contains your firmware files.
  14. Inside the folder download, you should find a number of files that look similar to the picture below.
    content firmware file
    content firmware file
  15. If your list of firmware files includes “fwinfo.xml” as shown below you can manually delete it before continuing to the FlashTool steps. You MUST delete this file otherwise your FTF firmware file will corrupt.
    delete fwinfo.xml file
    delete fwinfo.xml file
  16. Good luck and feel free to download Sony Xperia C4 Firmware 

Cara Hard Reset Android Lenovo VIBE X S960

Cara Hard Reset Android Lenovo VIBE X S960


Hard Reset Lenovo VIBE X S960. Salam jumpa kembali bersama kami di We, posting berikutnya kali ini saya akan berbagi tentang guide untuk melakukan Hard Reset pada Lenovo VIBE X S960. Perlu anda ketahui bahwa jika anda melakukan proses Hard Reset maka semua data penting yang tersimpan di dalam perangkat android tersebut akan hilang atau terhapus, Saran saya, lakukan backup secara berkala terhadap semua data yang penting, langkah ini masih dapat anda lakukan jika Smartphone masih dalam keadaan normal, beda cerita jika ini terjadi dalam keadaan Bootloop pada Lenovo VIBE X S960. Device ini merupakan smartphone dengan layar LCD 5.0 inci bekerja pada sistem Android OS, v4.2.2 (Jelly Bean), dan prosesor Mediatek MT6589T Quad-core 1.5 GHz Cortex A7 dan GPU PowerVR SGX544MP2 sebagai mesinya, serta dikombinasikan dengan RAM 2 GB, serta kamera 13 MP.
Hard Reset Lenovo VIBE X S960

      Apa yang h arus dilakukan untuk mengatasi dan meRecovery jika terjadi masalah pada Lenovo VIBE X S960 seperti hang/Not Responding/Malfungsi/Stuck/Freezing/brick

      Lenovo sudah memasukan beberapa aplikasi bawaan pabrik untuk membuat ponsel ini dapat bekerja dengan baik saat pertama kali digunakan. Lenovo VIBE X S960 menggunakan Lenovo user interface versi 3.0. Kita dapat menambahkan aplikasi lain dari Google Play Store seperti Whatsapp, BBM, GARIS, Facebook, Path, Skype, Instagram dan masih banyak lagi. Tapi kita harus tahu bahwa beberapa aplikasi di Google Play Store juga tidak selalu kompatibel dengan Lenovo VIBE X S960, aplikasi tersebut dapat membuat ponsel kita menjadi masalah seperti hang atau stuck atau brick atau beku atau rusak. Kadang ponsel ini selalu booting hanya pada logo Lenovo atau layar sentuh LCD tidak respon dengan sentuhan jari kita. Ketika ponsel ini mendapat maslah, maka kita harus memaksa soft reset atau shutdo wn atau reboot untuk membersihkan file-file temporari dan cache. Jika masalah ini masih terjadi maka kita harus melakukan hard reset atau format ulang. Biasakan untuk selalu melakukan backup yang diperlukan sebelum melakukan hard reset, karena semua data dan aplikasi yang terinstal akan terhapus setelah melakukan hard reset.

      Cara Memaksa Shutdown atau Memaksa Soft reset atau Reboot atau Restart Lenovo VIBE X S960


      Ketika smartphone Lenovo VIBE X S960 kita mendapatkan trouble ditengah-tengah menjalankan sebuah aplikasi, kadang-kadang dapat mengakibatkan hang atau stuck dimana hal ini membuat LCD Touch Screen menjadi tidak responsiv terhadap sentuhan jari kita. pada saat kejadian ini, kita harus melakukan shutdown/restrat secara paksa, untuk membersihkan cache dan file temprari. cara yang paling mudah yang dapat anda lakukan adalah dengan melepas batery dengan cara mem buka casing bagian belakang, dan tunggu kira-kira 5 detik baru memasang kembali. Kemudian dapat kita nyalakan kembali dengan cara menekan tombol power yang terletak bagian dibelakang, karena posisi dari tombol power pada Lenovo VIBE X S960 berada pada bagian belakang dibwah kamera utama.Melakukan soft reset adalah aman dan dapat anda lakukan kapan saja, karena pada prinsipnya melakukan soft reset hanya membuang file cache atau temporari pada sistem android saja, sedangkan semua data penting kita akan tersimpan dengan aman pada tempatnya.

      Cara lain melakukan soft reset adalah dengan cara menekan dan menahan tombol power beberapa detik hingga muncul Pop Up menu, setelah itu silahkan anda pilih Power Off/Reboot/Restart Menu.

      Langkah Hard Reset Lenovo VIBE X S960.

      1. Pastikan Battery terisi dengan cukup, saya sarankan kondisi battery terisi minimal 70%
      2. Ma tikan perangkat lenovo VIBE X S960 anda, dengan cara menekan dan menahan tombol power beberapa detik.
        Hard Reset Lenovo VIBE X S960
        Hard Reset Lenovo VIBE X S960
      3. Kemudian setelah lenovo VIBE X S960 mati, lanjutkan dengan menekan tombo l Volume Up + Power secara bersamaan..

        Hard Reset Lenovo VIBE X S960
        Hard Reset Lenovo VIBE X S960
      4. Lepaskan semua tombol ketika muncul logo Android pada layar.
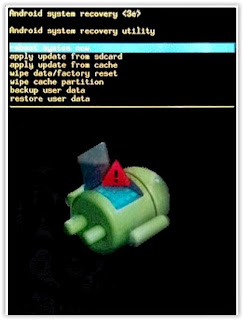
      5. Setelah itu anda akan masuk ke Recovery Mode. gunakan tombol up untuk memilih menu yang tampil

      6. Tekan tombol Volume Down untuk memilih "wipe data/factory reset".
        Hard Reset Lenovo VIBE X S960
        Hard Reset Lenovo VIBE X S960
      7. Kemudian pilih Tombol Menu untuk konfirmasi.
      8. Lanjutkan dengan memilih "Yes--delete all user data". Gunakan Tombol Volume Down untuk memilih dan Tombol Menu untuk mengeksekusi perintah to select.
      9. Untuk melakukan restart pada Lenovo VIBE X S960 silahkan pilih "Reboot System Now"
      10. Berhasil su kses, Anda telah melakukan hard reset pada Lenovo VIBE X S960.
      Guide Video